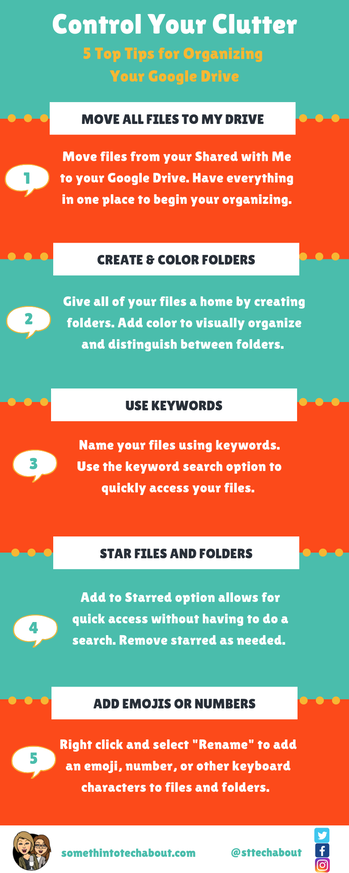
 Google Drive is the hub for all of your digital and electronic files and if you are a regular user of G Suite, it does not take long for your drive to become cluttered. Spending time searching for what you are looking for takes time away from what you could be working on and by using some best practices you will find your Google Drive better organized and much easier to navigate. In today's episode we discuss ways for controlling your clutter by organizing your Google Drive. Tips for Organizing Your Google Drive*These are tips and suggestions. If you have a process that works for you, stick with it and share with us and we will pass on your suggestions. 1. Move all of your files from Shared with Me to My Drive. Beginning with this step will put all of your files in one place making it easier to move where needed. You may also want to consider removing files (trash) you no longer need at this point. 2. Create folders for files and then begin moving files to their folder. Consider how you want to organize and name your folders - suggestions below. Also, keep in mind that you can also create sub-folders within the main folder. For example, if you have a main folder named Data you could add sub-folders for Math, Survey Responses, Sales, Data Team, etc. 3. Color code your folders. Grey is a pretty color but once you have created several folders nothing stands out and all folders look alike. With a simple right click on a folder, you can select the Change Color option to not only make them more visually appealing but have them stand out. Think about how color coding folders can work for you and stick with it. 4. Name your files using keywords for easier searching. With Google's advanced search options within Google Drive, using the keyword search option will produce quicker results. Another tip especially if you create examples for training, meetings, or other reasons where you just want to show but not keep, name those files DELETE or TEMP. When ready to remove those documents, search for the keyword DELETE or TEMP and boom, they appear and you can begin removing. 5. Create a folder named "Previous" and move all older files here. This method is a great way to do an easy clean up. 6. Star current or important files and folders. In your document list on the left side you will see the Starred category. The Add to Starred option allows for quick access without having to do a search. Think about starring templates, reference files, and files you may be currently working on. 7. Begin creating new files in in their appropriate folders. Opening the folder that a new file will be housed prior to beginning a new file will save you steps in the future. Your file will automatically be in its correct folder eliminating the need to move it later on. On this episode we also talked about some other tips that you may find helpful. The first being the importance of signing into your Chrome browser if you are not using a Chromebook. This allows you to add extensions, sync and link your data on other devices, and show your bookmarks bar. All of these add to the impact of using the Chrome web browser. More options for Chrome can be found by clicking the 3 vertical dots (skinny snowman) in the upper right hand corner of your browser. The "Save to Google Drive" extension lets you save web content or screen capture directly to Google Drive. We also suggested adding an Emoji keyboard extension to make it easier to add them to your Google files and folders. One last tip we offered was a reminder for sharing folders and/or files. It is suggested that you not overlook the Advance options for sharing. Depending on who and how you want to share, the Advance options will make it easier. How do you control your clutter in Google Drive? Share your tips in the comments below.
0 Comments
Leave a Reply. |
Categories
All
Archives
December 2020
|

 RSS Feed